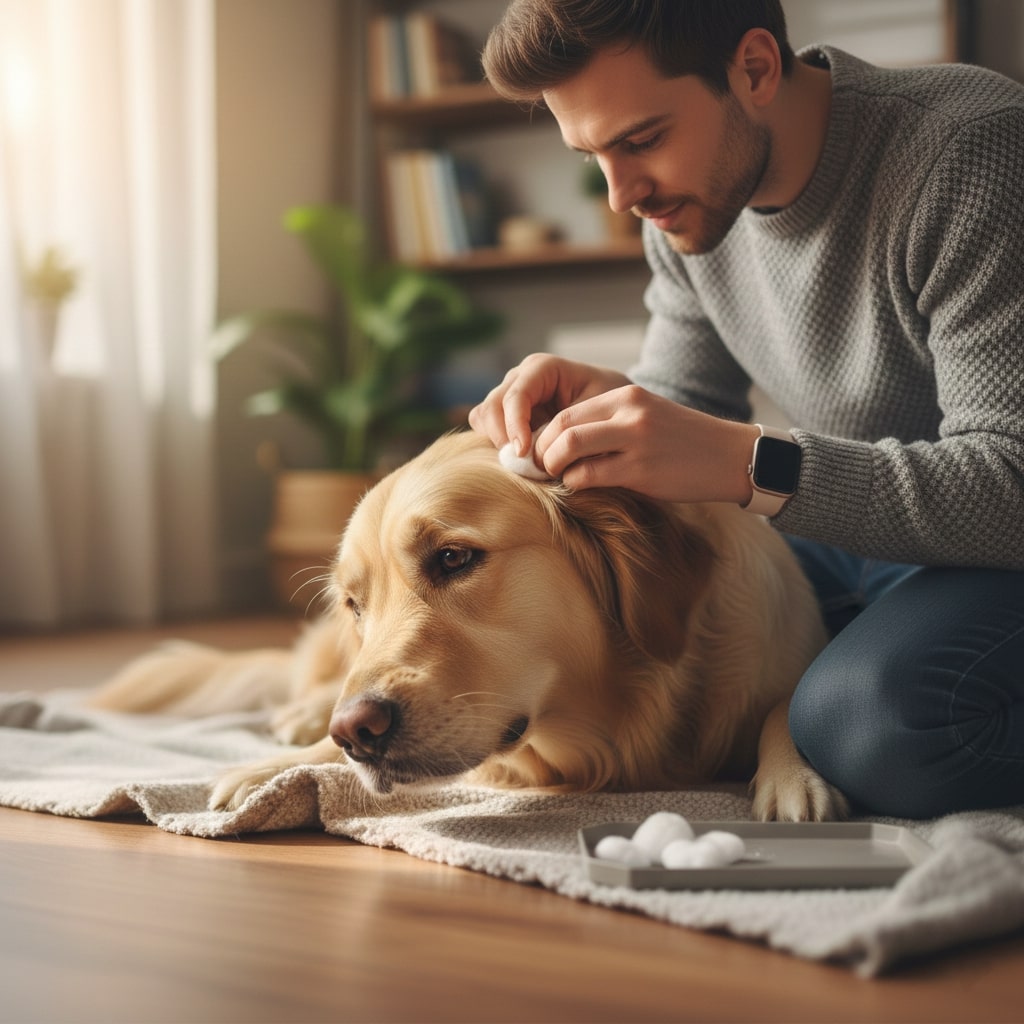
To safely clean your dog’s ears, lift the ear flap to straighten the L-shaped ear canal and fill it with a vet-approved ear cleaning solution. Gently massage the base of the ear for 30 seconds to break up debris, then allow your dog to shake their head. Finally, use a cotton ball or gauze pad to wipe away visible wax from the outer ear. Never use Q-tips or insert anything deep into the canal.
Summary Table
| Category | Details |
| Best Supplies | Vet-approved solution, cotton balls/gauze, towel, treats. |
| Tools to Avoid | Q-tips (cotton swabs), hydrogen peroxide, alcohol, vinegar. |
| Frequency | Floppy ears/Swimmers: Weekly or bi-weekly. Prick ears: Monthly or as needed. |
| Safety Rule | Stop immediately if you see redness, blood, or if the dog yelps in pain. |
| Key Anatomy | Pinna (ear flap), Vertical Canal, Horizontal Canal, Tympanic Membrane (eardrum). |
How to Safely Clean Your Dog’s Ears
Ear infections (otitis externa) are one of the top reasons dogs visit the vet. Unlike humans, dogs have an L-shaped ear canal that traps moisture, dirt, and parasites like ear mites. While regular cleaning is vital for hygiene, doing it incorrectly can damage the delicate tympanic membrane (eardrum) or push wax deeper.
This guide covers everything you need to know to clean your dog’s ears safely at home, using simple techniques and the right supplies.
Read Also: Can Dogs Eat Sugar?
Dirty Ears vs. Ear Infection
Before you start, you must ensure you are dealing with simple dirt and not a medical issue. Cleaning an infected ear can be incredibly painful for your dog and may worsen the condition.
Signs of a Healthy (But Dirty) Ear
- Color: The skin inside is pale pink.
- Discharge: Mild amount of yellow or light brown cerumen (earwax).
- Odor: No smell or a very faint “doggy” scent.
- Behavior: The dog is not scratching or shaking their head excessively.
Signs of an Ear Infection (Do Not Clean – See a Vet)
- Redness: The ear flap or canal looks inflamed or angry.
- Odor: A strong, yeasty, or foul smell (often compared to old cheese or corn chips).
- Discharge: Dark brown/black coffee-ground texture (sign of mites), green/yellow pus, or blood.
- Sensitivity: Your dog pulls away, whines, or cries when you touch their ears.
Important: If your dog shows signs of infection, skip the cleaning and book a vet appointment. They may need a cytology swab to identify yeast or bacteria.
2. How Often Should You Clean Your Dog’s Ears?
Over-cleaning can strip natural oils and cause irritation. The frequency depends largely on your dog’s breed and lifestyle.
- Floppy-Eared Breeds (e.g., Cocker Spaniels, Bassets, Poodles): These dogs have poor air circulation in the ear canal.
- Frequency: Check weekly; clean every 1–2 weeks.
- Swimmers (e.g., Labradors, Golden Retrievers): Moisture is the enemy.
- Frequency: Clean and dry ears after every swim session to prevent “swimmer’s ear.”
- Prick-Eared Breeds (e.g., German Shepherds, Huskies): These ears get plenty of airflow.
- Frequency: Check monthly; clean only when you see visible wax buildup.
3. The Essential Supply List
Gather your supplies before you call your dog. Being prepared makes the process faster and less stressful.
What You Need
- Vet-Approved Ear Cleaning Solution: Look for ingredients like salicylic acid (drying), ketoconazole (anti-fungal), or simply a gentle saline flush. Avoid homemade mixtures unless a vet prescribes them.
- Cotton Balls or Gauze Squares: These are soft and absorbent.
- Towel: Things will get messy when your dog shakes!
- High-Value Treats: Peanut butter (xylitol-free) or small training treats to create a positive association.
What to AVOID
- Q-Tips (Cotton Swabs): These act like a ramrod, pushing wax down the vertical canal and packing it against the eardrum. They can also rupture the drum if the dog jerks.
- Hydrogen Peroxide: This bubbles and destroys healthy tissue cells, delaying healing.
- Rubbing Alcohol: Extremely painful and drying; it will sting fiercely if there are any micro-abrasions.
- Vinegar: While acidic, it is too harsh for inflamed ears and can cause stinging.
Read Also: Can Dogs Eat Ketchup?
Step-by-Step Guide: How to Clean the Ears
Follow this routine to ensure a deep clean that reaches the horizontal canal without hurting your pet.
Step 1: Relax and Position
Sit on the floor with your dog. If you have a large dog, have them sit in front of you with their rear between your legs. For small dogs, place them on a table (with a non-slip mat) or your lap. Give a treat just for letting you handle their ears.
Step 2: Straighten the Canal
Gently grasp the tip of the pinna (ear flap) and pull it vertically upwards (and slightly outwards).
- Why? This straightens the “L” shape of the canal, allowing the cleaning solution to travel all the way down to the horizontal section.
Step 3: Fill the Ear
While holding the flap up, squeeze the cleaning solution into the ear canal. Do not be afraid to use a generous amount; you want to fill the canal until you see the liquid rising.
- Tip: Do not let the tip of the bottle touch the ear. This prevents bacteria from the ear from contaminating the bottle.
Step 4: Massage the Base
Still holding the ear flap up, use your other hand to gently massage the base of the ear (the area below the ear opening, near the jaw).
- Technique: You should hear a squishing or smacking sound. This noise means the fluid is moving around effectively, breaking up the wax and debris deep inside. Massage for about 20–30 seconds.
Step 5: The Shake
Stand back and let go! Your dog will instinctively shake their head vigorously. This centrifugal force is essential—it flings the dissolved wax and debris from the deep horizontal canal up to the outer ear where you can reach it. Use the towel to shield yourself if necessary.
Step 6: Wipe Clean
Take a dry cotton ball or gauze pad and gently wipe the inside of the ear flap and the opening of the ear canal.
- Rule of Thumb: Only wipe where your finger can easily reach. Never dig.
Read Also: Can Dogs Eat Hot Dogs?
Common Mistakes to Avoid
Even well-meaning owners make mistakes that can lead to ear trauma.
- Plucking Ear Hair: Some breeds (like Poodles) grow hair inside the canal. Modern veterinary advice suggests not plucking this unless there is a specific infection. Plucking creates tiny open wounds that bacteria love.
- Using Water: Water does not evaporate quickly and can get trapped, creating a moist environment perfect for yeast growth. Always use a drying ear solution.
- Waiting Too Long: If you ignore a mild odor, it can turn into a severe inner ear infection that affects your dog’s balance (vestibular system).
- Disciplining the Dog: Ear cleaning is uncomfortable. If you scold your dog for struggling, they will fear the process. Always use positive reinforcement.
When to Call the Vet
If you are cleaning the ears and notice any of the following, stop immediately and call your clinic:
- Bleeding: Even a small amount of blood on the cotton ball is abnormal.
- Hematoma: If the ear flap feels swollen, hot, or puffy (like a water balloon), your dog may have an aural hematoma from shaking their head too hard.
- No Improvement: If the ears get dirty again within 2-3 days of cleaning, there is likely an active infection requiring antibiotics.
- Head Tilt: If your dog holds their head to one side, the infection may have moved to the middle or inner ear.
Conclusion
Regular ear maintenance is a simple but critical part of pet parenting. By using the right products and the “Fill, Massage, Shake, Wipe” method, you can prevent painful infections and keep your dog comfortable.
Remember, you are the first line of defense for your dog’s health. If something looks or smells wrong, trust your gut and consult your veterinarian.